Handcrafted natural solid wood toys & safe non-toxic finishes
All ages (0 to 6 years)
Parent guide, ages 3 to 6

Montessori toys for 3 year olds up to age 6 A guide to play, reading and maths

This guide to Montessori toys for 3 year olds, and on up to age 6, follows your child through the nursery and Reception years, as sensory play gives way to first letters and first sums. A child of this age, the child Maria Montessori welcomed into her Children's House, wants to understand how things work, and understands through the hands: tracing the shape of a letter with a finger before writing it in pencil, sliding beads along one by one before ever writing down an addition.

Inside you will find year-by-year development milestones, the sandpaper letters approach and sound-first reading, a step-by-step method for hands-on maths, activities that are easy to set up, ideas for arranging a work corner at home and a selection of materials with notes on how to use them. The ages given are guidelines only: every child moves through these stages at their own pace, and none of this learning is a race.

Is your child not quite 3 yet? Our guide to Montessori toddler toys covers the year before.

Key stages from 3 to 6

From 3 to 6: development milestones, year by year

These milestones describe what is most often seen in a Montessori class for 3 to 6 year olds, and at home. A child can be ahead in one area and take their time in another: use them to decide which Montessori toys for 3 year olds and older children to offer, never to make comparisons. For a ready-made selection, our range of toys for 3 year olds brings together the materials for this age group.

3-4 years
From 3 to 4 years

Refining the senses and gaining precision

Fine motor skills and order
What your child is going through

Senses & perception

At 3, children want to do it ‘all by myself’ and will repeat the same movement dozens of times: pouring, screwing lids on and off, doing up buttons, stacking from biggest to smallest. They sort by colour and size without being asked, can name a great many objects and never stop asking ‘why?’. The pincer grip between thumb and index finger becomes much steadier.

What draws them in: contrasts in size, colours, shapes and order
Recommended Montessori materials

Tools & hands-on work

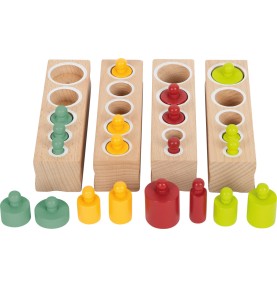
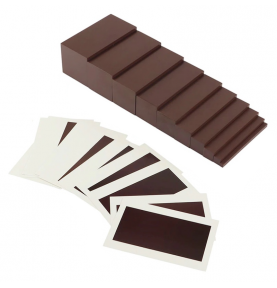
Sensorial materials isolate a single quality: the cylinder blocks for dimension, the brown stair for thickness, the colour boxes for shades. Dressing frames and lacing games get the hand ready for the pencil, and the first shape puzzles are built directly on top of a life-size model.

Look for: one skill at a time and materials that show the mistake
A supportive approach

The adult's role

Show the activity with slow movements and hardly any words, then step back. Let your child come back to it as often as they like: concentration takes root through free repetition.

Golden rule: never interrupt a child who is concentrating, not even to praise them
What you will often notice
  • Threads large beads onto a lace and unscrews a lid unaided.
  • Puts a few objects in order from biggest to smallest, with a few tries.
  • Counts small groups of objects, pointing at each one.
  • Loves nursery rhymes, rhyming words and finger games.
4-5 years
From 4 to 5 years

Hearing sounds and discovering letters

Writing before reading
What your child is going through

Senses & perception

Around 4, children become very tuned in to sounds: they hear the first sound of a word, then the last one, and find rhymes hilarious. This is often when they ask how to write their own name. In maths, they match a quantity to a numeral and carry on counting aloud past 10.

What draws them in: the sounds of language, their own name, the shapes of letters
Recommended Montessori materials

Tools & hands-on work

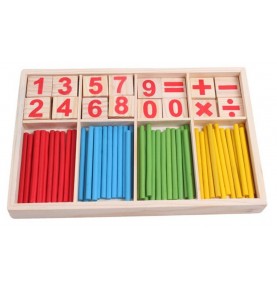
Sandpaper letters, which are easy to make at home, followed by a wooden movable alphabet to build words by sound, even before they can hold a pencil perfectly. For maths: counting sticks, wooden numerals and first tries on a 100-bead abacus. Geometric silhouettes to copy follow on naturally from shape puzzles.

Key tip: say the sound of the letter (‘mmm’), not its name (‘em’)
A supportive approach

The adult's role

Slip little listening games into the day (‘I spy with my little eye something beginning with p’). Welcome the words they build without correcting the spelling: at this stage, the joy of writing what they want to say matters more than getting it right.

Tip: value the urge to communicate and to invent their own words
What you will often notice
  • Finds an object in the room that begins with a given sound.
  • Traces the outline of a letter with their fingertips while saying its sound.
  • Matches the numerals 1 to 10 to the right number of counters.
  • Holds a pencil with more confidence and enjoys going over tracing lines.
5-6 years
From 5 to 6 years

Reading first words and counting in tens

From concrete to abstract
What your child is going through

Senses & perception

Between 5 and 6, many children blend sounds together to read short, regular words, then little sentences. They love big numbers, compare and measure things, and want to know ‘how many is that altogether?’. Adding and taking away start with materials in hand, and the idea of ten becomes visible the moment a row of ten beads is full.

What draws them in: big numbers, logic challenges, reading on their own
Recommended Montessori materials

Tools & hands-on work

A horizontal abacus, number rods or counting sticks for first sums, a spindle box to understand zero, and word labels to set next to miniature objects. Seven-piece shape puzzles invite them to invent figures of their own.

Star materials: the abacus, the spindle box and reading labels
A supportive approach

The adult's role

Let the materials show the answer. If the count is not right, invite your child to count again, pointing at each piece, without any reproach. And keep reading them bedtime stories that are far richer than anything they can decode yet.

Principle: checking for yourself builds lasting confidence
What you will often notice
  • Reads short words such as ‘sun’, ‘map’ or ‘bed’ by blending the sounds.
  • Builds words with movable letters and reads them back.
  • Understands that a ten is made up of ten ones.
  • Recreates a geometric silhouette without a life-size model.
How to choose

How to choose a toy between 3 and 6: 6 practical criteria

Between 3 and 6, the choice of so-called ‘educational’ toys is enormous. These six questions, easy to check on a product page or in a shop, are enough to rule out most disappointing purchases.

1

One difficulty at a time

Good materials isolate the one thing a child is meant to discover: size with the brown stair, a sound with a sandpaper letter, quantity with counting sticks. A toy that mixes lights, music, colours and numbers scatters attention instead of gathering it.

2

Built-in control of error

Your child should be able to see a mistake for themselves: a cylinder that will not go in, a counting stick left over at the end, a piece sticking out of the tray. They put it right without waiting for an adult's verdict, and their confidence stays intact.

3

Real objects, at their size

A small jug that actually pours, a real button to do up, wooden pieces with some weight to them: at this age, children want tools that work. A breakable object also teaches them to take care.

4

Materials that grow with them

Counting sticks are for counting at 3 and for adding at 5; a set of shapes is first for fitting into a board, then for inventing figures. Choose things with several uses over a toy that can only be played one way.

5

The right age, and small parts

Follow the age given on each product page: many materials for this age group contain small parts (beads, cylinders, letters) and are used with an adult nearby. Too hard, and an object discourages; too easy, and it bores.

6

Simple, complete storage

One tray, box or basket per activity: your child knows where to find it and where to put it back. A complete set, with no missing pieces, keeps all its meaning; check it together when tidying away.

Signs that an activity is not the right one yet

Your child always uses it for something else (throwing, mixing or stacking the pieces), asks for help at every step, or never picks it after two or three presentations. Nothing to worry about: put it away for a few weeks and offer it again later, or go back to a simpler step. The opposite is a sign too: a child who gets it right first time and never returns to it is ready for the next step.

Language

Montessori sandpaper letters: feeling the shape of a sound

Sandpaper letters are letters cut out of fine sandpaper and glued onto smooth boards. Your child traces them with the index and middle fingers, in the direction of writing, while the adult says the sound. Three kinds of memory work together: the movement of the hand, the shape seen by the eyes and the sound heard by the ears. In the Montessori approach, this is the way into writing, and therefore into reading.

Writing before reading

Maria Montessori observed that it is easier for a young child to build a word from sounds they already know than to decode a word someone else has written. They know what they want to say; all they are missing are the symbols. Sandpaper letters give them those symbols, one at a time, through touch.

Once they know around ten, they put movable letters together to write ‘sun’ or ‘map’, long before they can hold a pencil perfectly. Reading comes afterwards, often as a discovery: they read back what they have just written.

The letter's sound, not its name

Always say the sound: ‘mmm’ rather than ‘em’, ‘sss’ rather than ‘ess’, ‘rrr’ rather than ‘ar’. With sounds, your child hears straight away that ‘mmm’ and ‘aaa’ make ‘ma’. With names, they try to read ‘em-ay’, and nothing happens. The letter names will come later, effortlessly, with the alphabet song.

For English sounds written with two letters (‘sh’, ‘ch’, ‘th’, ‘ee’), you can make double-letter boards later on and present them in exactly the same way.

Making sandpaper letters at home

We do not sell sandpaper letters, but you can make a set in an afternoon. First choose the style of letter: some families go for cursive (joined-up handwriting), others for the print letters found in books. If your child's school has a handwriting style, follow it. Keep the same choice for the whole set.

  1. Cut 26 identical boards from very thick card or thin plywood: something close to postcard size works well.
  2. Choose two background colours. In Montessori materials, vowels traditionally go on a blue background and consonants on pink or red.
  3. Draw each letter back to front on the back of fine sandpaper, cut it out and glue it in the middle of its board.
  4. Mark a small dot where the finger starts tracing, so that the movement is always the same.
  5. Leave to dry flat under a few books, then store the boards upright in a box.

Presenting a sandpaper letter, step by step

Most children start at around three and a half or 4, when they happily play at finding sounds in words.

  1. Sit beside your child with two or three letters whose sounds and shapes are very different, for example ‘m’, ‘a’ and ‘t’.
  2. Slowly trace the first letter with your index and middle fingers held together, in the direction of writing, then say its sound: ‘mmm’.
  3. Invite your child to trace it in turn, saying the sound, as many times as they like.
  4. Move on to the three-period lesson described further down: ‘Show me mmm’, then, on another day, ‘What is this?’.
  5. Stop before they lose interest: two or three letters per session are plenty.

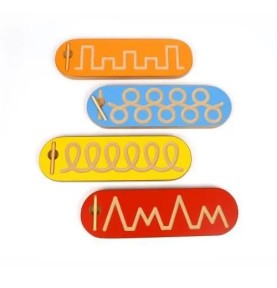
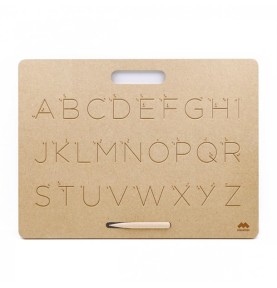
To take finger tracing further, a grooved wooden tracing tablet lets your child repeat the strokes with a stylus, and our range of phonics toys brings together wooden letter puzzles and games.

Towards reading

Learning to read the Montessori way: 5 steps in order

Montessori does not wait for a ‘reading age’: it follows a progression in which each step prepares the next, and you move on when your child asks for more. The moment it clicks often comes between four and a half and 6, sometimes earlier, sometimes later, and the timing says nothing about what comes after.

  1. 1 From 3

    Playing with sounds

    Nursery rhymes, rhyming words, ‘I spy something beginning with sss’: your child learns to hear the sounds inside words without a single written letter. This is the most important step, and it needs no materials at all.

  2. 2 Around 3 and a half to 4

    Touching sandpaper letters

    They link each sound to a shape they trace with a finger. There is no need to know the whole alphabet before moving on: around ten sounds, including a few vowels, are enough.

  3. 3 Around 4 to 5

    Building words with movable letters

    They say a word slowly, ‘s-u-n’, and lay down one letter for each sound. That way they write before they can read, and before they can hold a pencil well. Spelling mistakes are normal: ‘kat’ for ‘cat’ is a success.

  4. 4 Around 5

    Reading regular words

    Labels to place next to miniature objects (‘cat’, ‘pig’, ‘sun’): your child blends the sounds, finds the object and checks on their own that they have read it correctly.

  5. 5 5 to 6

    Trickier sounds, little words and sentences

    They discover ‘sh’, ‘ch’ and ‘ee’, the common little words that do not follow the rules (‘the’, ‘is’, ‘was’) and read short sentences that ask for an action, such as ‘hop twice’: reading sets off a game.

Montessori reading at home: from labels to first books

Once your child can blend sounds, what they need most is reasons to read. No workbooks or worksheets: just small opportunities slipped into everyday life.

  • Label a few things around the house (bed, box, mug) with regular words, written in the same style as their sandpaper letters.
  • Hide little action messages (‘find the spoon’, ‘clap three times’): they read to find out what to do.
  • Choose a few books with short sentences and regular words for them to read alone, and keep reading them much richer stories every evening.
  • Ask them to read back the words they have built with the movable letters: this is often the first reading that makes them truly proud.
  • Keep books at their height, covers facing out, and swap them regularly, just like the other activities.

What holds back more than it helps

  • Having them recite the alphabet by letter names before they know the sounds.
  • Correcting every mistake in the words they build on their own.
  • Turning the bedtime story into a decoding exercise.
  • Comparing them with a brother, a sister or a classmate.

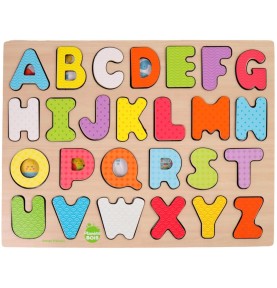
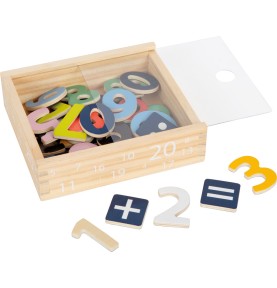
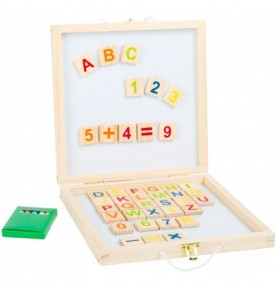
Tip: once lifted out of their board, the letters of a wooden alphabet puzzle make a first movable alphabet, and Montessori magnetic letters on the fridge door can do the same job. You will find several wooden alphabet puzzles among our alphabet toys.

Letter games

Montessori games for 4 year olds: learning the alphabet by sound

These six games, for 4 and 5 year olds, all rely on the sound of each letter and follow on from the sandpaper letters. Allow five to fifteen minutes, and stop while your child is still asking for more: that is what will make them want to come back to it the next day.

The sound basket

From 4

You need: A basket and 5 or 6 small objects, 3 of which begin with the same sound (button, bowl, banana).

How to play: Take the objects out one at a time, naming each one. Your child sets aside the ones that begin with ‘b’. Once that is easy, look for the sound at the end of the word.

Fishing for letters

From 4

You need: Wooden letters your child already knows, slipped into a cloth bag.

How to play: Your child pulls out a letter, says its sound, then goes off to find something in the room that begins with that sound, and comes back to put it next to the letter.

The salt tray

From 4

You need: A tray with raised edges, a thin layer of fine salt, semolina or sand, and a sandpaper letter as a model.

How to play: They touch the sandpaper letter first, then trace the same letter with a finger in the tray while saying the sound. A little shake of the tray wipes it all away, so they can start again as often as they like.

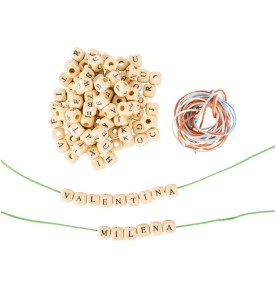
My name in beads

4 to 5

You need: Letter beads and a ribbon, with the name written on a card as a model.

How to play: They find the letters of their name, thread them in order, then check against the card. Next come the names of the rest of the family, then words of their own choosing.

Lacing a letter

4 to 5

You need: Lacing cards with a letter theme, or a letter drawn on a piece of card punched with holes.

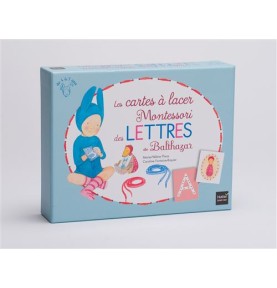
How to play: They pass the lace from hole to hole along the letter, then say its sound once the card is finished. The slow movement fixes the shape in their memory.

Vowels on one side, consonants on the other

5

You need: A wooden alphabet puzzle and two mats or two trays.

How to play: They take out all the letters, say each one by its sound and sort them into two families: the vowels, which can be ‘sung’ for a long time, and the consonants. Then they put them back in the puzzle.

As for materials, wooden letter beads are perfect for the name game, letter lacing cards for lacing, and a safari alphabet puzzle for sorting vowels and consonants.

Maths and geometry

Montessori maths and geometry: touching quantities before calculating

In Montessori, no maths idea is learnt by heart before it has been handled. Your child needs to connect three things: the word (‘seven’), the symbol (7) and the quantity (seven objects). Until those three come together, a written sum is just a string of signs. Well-chosen counting toys exist precisely to bring them together.

1
Maths

Sensorial maths: touching quantities

Matching quantities and numerals

A classic exercise: number cards from 1 to 10 laid out in a row and 55 counters, which is exactly 1 + 2 + … + 10. Your child places the right number of counters under each numeral, in pairs. If some are missing or left over, they count again; and along the way they discover that some numbers always have one counter on its own: the odd numbers.

The decimal system with golden beads

In a Montessori classroom, a unit is one golden bead; a ten is a bar of ten beads; a hundred is a square of ten bars; a thousand is a cube of a thousand beads. Holding the cube in one hand and a single bead in the other, a child physically feels the difference. At home, a 100-bead abacus gives the same picture of tens: every full rod is one ten.

The spindle box and zero

Ten compartments numbered from 0 to 9 and sticks to place in them: when they reach the 0 compartment, your child puts nothing in and understands that zero means ‘none’. You can make one with a ten-compartment box and exactly 45 sticks (0 + 1 + 2 + … + 9): if one is left over at the end, the mistake shows itself.

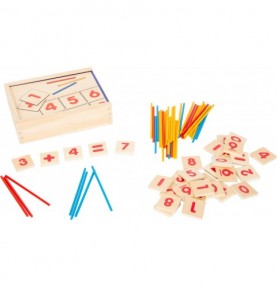
Before the abacus, very simple games for learning to count (counting sticks, number boards, counters) are more than enough for the first few years.

2
Geometry

Geometry and spatial awareness

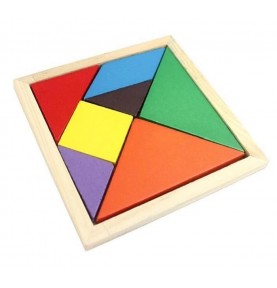
Geometry starts with the hands: a cube, a sphere or a cylinder recognised with eyes closed inside a bag, cylinders put in order from biggest to smallest. Then come the tangram shapes, seven pieces cut from a single square, which stay with your child right through the nursery and Reception years, in three steps.

Step 1 • 3-4 years

Matching on a life-size model

Your child lays the wooden pieces directly onto a printed model of exactly the same size. They learn to turn a triangle until it fits, with no pressure at all.

Step 2 • 4-5 years

Recreating a silhouette

Faced with a shadow shape with no inner lines, they work out how to arrange the pieces to rebuild the whole silhouette: a cat, a house, a boat.

Step 3 • 5-6 years

Free creation and challenges

They invent figures of their own, draw them to keep them, or try to rebuild the original large square from the seven pieces.

Wooden sets, from the simplest to boxes full of silhouettes, are gathered in our tangram puzzle and wooden puzzle range.

Maths step by step

Count, add, take away: maths with beads, step by step

The abacus is often the first piece of maths equipment families buy for home, and also the one that gets put away fastest, for lack of knowing what to do with it. Here is how it works, how to introduce it and five exercises to offer in order, from age 4.

How does an abacus work?

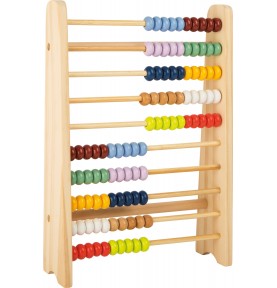
The horizontal abacus used with young children has 10 rods of 10 beads, so 100 beads in all. Each bead is worth one and each full rod is worth ten. All the beads start on the same side; you count by sliding them across to the other side. On most models the colour changes from one rod to the next, so the eye can spot the tens without counting everything again.

The Chinese abacus works differently: a central bar separates the upper beads, worth 5, from the lower beads, worth 1, and each rod stands for a place value (ones, tens, hundreds). A bead only counts when it touches the bar. It suits a child who already counts with ease, like our large traditional abacus in wood.

How to use an abacus with a 4 to 6 year old?

  1. Put it on a clear table in front of your child, with all the beads pushed to the same side (for example the right): this is the starting position.
  2. Let them explore freely first: sliding the beads, listening to the sound they make, lining up the rows.
  3. Show just one movement: one bead moved with the tip of the index finger for each number said aloud, slowly.
  4. Go back to the starting position before each new exercise, so the abacus is always read the same way.
  5. Keep sessions short, five to ten minutes, and stop when attention drops.

The horizontal wooden abacus in our selection, with its 100 beads on 10 rods, is recommended from 4 years: its sliding beads are used with an adult nearby.

How to count with an abacus: 5 exercises in order

  1. 1

    Counting to 10

    On the first rod, your child slides the beads across one at a time while counting. At ten, the rod is full: they have just built a ten.

  2. 2

    Showing a number

    You say ‘seven’, they slide seven beads across, then count again to check. Then swap roles: you move some beads, they say how many.

  3. 3

    Adding up to 10

    For 3 + 4, they push three beads across, then four more on the same rod, and count them all. They see that the order makes no difference: 4 + 3 gives the same row.

  4. 4

    Crossing the ten

    For 8 + 5: eight beads on the first rod, two more to fill it, then the three left over on the next rod. They read ‘one ten and three’, so 13. This is the movement that replaces counting on fingers.

  5. 5

    Taking away and counting in tens

    For 9 − 4, they slide nine beads across and push four back. Later, they slide whole rods across, counting ‘ten, twenty, thirty…’ all the way to a hundred.

When should you move on to written numbers?

Only once the movement is secure. Then put a ‘13’ label next to the abacus after exercise 4, or let your child write out the sum with magnetic wooden numbers. The symbol comes last, to name what the hands have already understood.

How to present

The three-period lesson: introducing an idea without setting up failure

Borrowed from the French physician Édouard Séguin and taken up by Maria Montessori, this approach can be used to introduce any new word or idea: a geometric shape, a sandpaper letter, a quantity. It never puts a child in a position to fail, because they are only asked to name something once they have recognised it. It is the method you will use for the letters, numbers and shapes in this guide.

1 ‘This is...’
Introduce it simply

First period: linking the name to the object

The adult links the object or letter directly to its exact name, using short, gentle sentences to hold the child's attention. Two contrasting items are enough for a first session.

Example: the adult traces the sandpaper letter with their fingertips and calmly says, ‘This is mmm.’ Then they introduce a second letter: ‘This is sss.’
Key point: speak calmly, move slowly and let your child watch the material closely.
2 ‘Show me...’
Learning through play

Second period: recognising through play

This is the most important stage, and the most playful. Your child handles the material without needing to name anything. Movement and play help the new word stick naturally.

Example: ‘Show me mmm’, ‘Can you put sss on the mat?’, ‘Hide mmm behind your back’, ‘Give me sss’.
Key point: if your child hesitates, do not correct them. Put the material away with a smile and offer the activity again another day.
3 ‘What is this?’
A natural confirmation

Third period: naming on their own

This stage only comes once the second period has been fully mastered. Your child is then ready to name the symbol or object with enthusiasm and pride.

Example: the adult points to the sandpaper letter and gently asks, ‘What is this?’ The child happily answers, ‘It's mmm!’
Key point: this period is not a test, but the warm, rewarding end point of something learnt successfully.
A supportive approach

How to encourage your child and nurture their motivation

Around 4 or 5, at home just as at school, children often come to show you what they have done: ‘Look at my tangram, did you see?’ The first reflex is often to exclaim, ‘That's amazing, you're a superstar!’ Yet recognising the effort and the process gives a child a far more lasting inner confidence than a hunt for compliments.

The Montessori approach favours descriptive encouragement: you describe carefully what your child has done and invite them to express their own satisfaction and discoveries.

Phrases that encourage without judging:

  • Recognise perseverance: ‘You tried lots of times until you found the right place for every piece.’
  • Describe what they did: ‘You sorted all the beads by colour, from lightest to darkest.’
  • Notice concentration: ‘You worked on that puzzle for a long time without stopping.’
  • Invite them to share their joy: ‘You look really proud of yourself. What did you enjoy most about it?’

By valuing effort and independence rather than performance or a perfect result, you nurture the joy of learning for its own sake, the kind that lasts long after the early years.

Activities at home

Montessori games for 3 year olds: 8 step-by-step activities

These activities need very little equipment, most of it already in your kitchen or toy box. Present one at a time, slowly, then let your child come back to it alone as often as they wish. Each card shows how to develop it up to 5 or 6, so that it stays interesting.

Spooning from bowl to bowl

Practical life

You need: Two identical bowls on a tray, a tablespoon, and large dried beans or chickpeas.

How to do it: Show how to hold the bowl with one hand and transfer spoonful by spoonful, from left to right, then pick up anything that has fallen. Stay close by: dried pulses should not be left within reach of a child on their own.

What next: A smaller spoon, then sugar tongs, then a pipette and coloured water at around 5.

Pouring water

Practical life

You need: A small jug filled a quarter full, a glass, a sponge and a tray.

How to do it: Pour slowly, holding the jug with both hands, put it down, then wipe up the drips with the sponge. Your child repeats it as often as they like and empties the glass into the sink.

What next: Pouring into two, then three glasses up to a line, and pouring water at the table for the whole family.

The mystery bag

Senses

You need: An opaque cloth bag and five familiar objects with very different shapes (spoon, ball, key, rubber, clothes peg).

How to do it: Your child puts a hand in without looking, describes what they feel (‘it's cold, it's round’), has a guess, then takes the object out to check.

What next: Finding two identical objects by touch, then recognising solid shapes: cube, sphere, cylinder.

Sorting with a clothes peg

Fine motor skills

You need: Three bowls in different colours, a handful of pompoms in those colours and a clothes peg.

How to do it: They pick up each pompom with the peg and drop it into the bowl of the same colour. The peg strengthens exactly the fingers that will later hold a pencil.

What next: Sorting by size, then by two criteria at once (colour and size) at around 5.

Buttons, zips and buckles

Independence

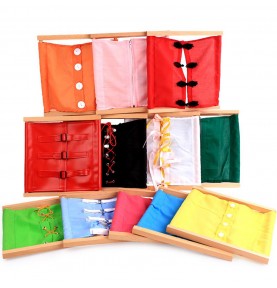
You need: A dressing frame, or an old cardigan laid flat on the table.

How to do it: Present one type of fastening at a time, very slowly, exaggerating every movement. Undo and do it up once more, then step aside.

What next: Real clothes, on themselves; laces and knots at around 5 or 6.

I spy

Language

You need: Nothing at all: you can play it anywhere, in the car, at the table, in a waiting room.

How to do it: ‘I spy with my little eye something beginning with mmm.’ Start with an object that is easy to see and with sounds you can stretch out (‘mmm’, ‘sss’, ‘fff’), which are easier to hear.

What next: Looking for the sound at the end, then counting the sounds in a short word: ‘c-a-t’, three sounds.

Counters and numbers

Maths

You need: Number cards from 1 to 5 and fifteen counters (buttons, conkers, bottle tops), which is 1 + 2 + 3 + 4 + 5.

How to do it: Lay the cards out in order. Your child places the right number of counters under each one. Once everything is laid out, there should be none left over: that is the control of error.

What next: Up to 10 with 55 counters, placed in pairs to discover odd and even numbers.

From biggest to smallest

Logic

You need: Five objects of the same kind in clearly different sizes: boxes, spoons, books or bottles.

How to do it: Mix them up, then line them up together from biggest to smallest. Let your child do it again alone and check it at a glance.

What next: Ten items with finer differences, like the prisms of the brown stair, then measuring with a ruler at around 6.

Toy ideas for three year olds, once the home version is mastered

When the home-made activity is well established, dedicated materials can take over: dressing frames for fastenings, the wooden geometric solids with their drawstring bag for the mystery bag game, and the brown stair for putting things in order of size. You will find more everyday skills to practise in our practical life range.

Preparing the environment

Setting up a Montessori corner at home, from 3 to 6

You do not need a whole room or special furniture: a free wall, a low shelf and a little order are enough. The aim is for your child to be able to choose, work and tidy up without asking for help.

A low shelf, few activities

Four to six activities on display are plenty, each on its own tray or in its own box, arranged from left to right from simplest to hardest. Your child can see everything, choose alone and put things back in the same place.

Regular rotation

Every one to two weeks, swap out whatever is no longer being chosen. Keep anything they come back to every day, even if it seems too easy to you: repetition shows they are still working on it.

A table at their height, and a mat

Feet flat on the floor, forearms resting on the table without raising the shoulders. A small mat rolled out on the floor marks out the space for larger activities, such as puzzles or the brown stair.

A reading corner

A few books with their covers facing out, a cushion and good light. Swap the books just like the activities, and always keep their favourites.

Practical life in the real rooms

In the kitchen, a sturdy step, a small jug, a sponge and an apron within reach; in the hallway, a low coat hook and a bench for getting dressed on their own.

A place to rest

A quiet corner, with no screens, where they can look at a book, watch the world go by or simply do nothing when they need to. Rest is part of the working day too.

Common mistakes between 3 and 6

They all come from good intentions: wanting to go faster, wanting to help more. Here is what helps instead.

  • Too many toys out at once

    Less choice means more concentration. Put the rest away in a cupboard and rotate.

  • Teaching letter names before letter sounds

    Say ‘mmm’ before ‘em’. The names will come later, effortlessly.

  • Moving to the pencil too early

    The hand gets ready through dressing frames, lacing, pegs and finger tracing; the pencil comes afterwards, and more easily.

  • Correcting every mistake

    Let the materials show the error. If your child does not spot it, offer the activity again another day.

  • Interrupting concentration

    Wait until the activity is finished before speaking, even to praise them or call them for a snack.

  • Skipping steps

    No written sums until quantities are secure with real objects, and no reading pushed on them before the sound games.

  • Turning home into a second school

    Free play, time outdoors and even boredom all keep their place. Ten minutes of a chosen activity are worth more than an hour that is imposed.

Our annotated selection

Montessori preschool toys: our selection for ages 3 to 6

Fourteen items from our catalogue, grouped by area and linked to the activities in this guide. The age shown is the one on the product page, where you will also find exactly what each set contains. To see the full range for this age group, browse our educational toys for 3 year olds and up, or the wider range of Montessori materials.

Language and getting ready to write

To go with the sound games and sandpaper letters: letters to touch, trace, thread and fit back into place.

Montessori maths toys: counting and quantities

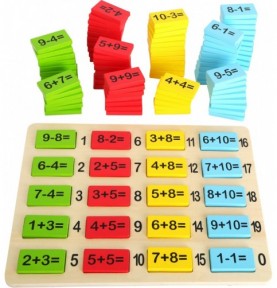
To connect the word, the numeral and the quantity, then watch tens appear under their fingers.

Senses, shapes and logic

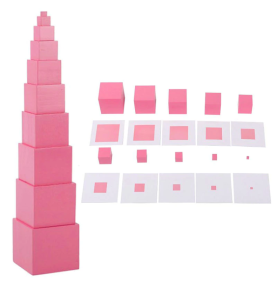
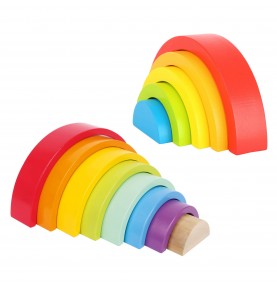
Sensorial materials isolate a single quality (size, thickness, sound): they are what prepare the eye and the hand for maths.

Practical life and independence

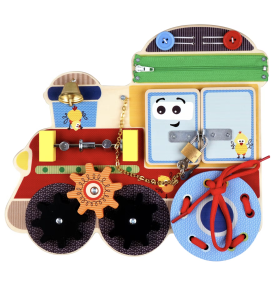
Buttons, zips and buckles: everyday skills that make children proud and get their hand ready for the pencil.

From 3 years
Montessori wooden dressing frame, 25 x 25 cm

Montessori Dressing Frame

Wooden frames measuring 25 x 25 cm, with one type of fastening per frame (chunky buttons, zip, poppers, buckle…). Available individually or as a set of seven.

More ideas, depending on what your child is into right now: our sensory games, our independence and everyday skills range and, for threading and making jewellery, a large wooden bead threading box with beads of every shape.

At a glance

Montessori toys for 3 year olds and beyond: what to offer at each age

The age bands overlap: follow what interests your child rather than the row in the table.

Age What absorbs them Language Maths and logic Practical life and senses
3-4 years Doing it themselves, sorting, ordering by size Nursery rhymes, rhyming words, listening games, picture books Counting small groups, shape puzzles on life-size models Pouring, spooning, dressing frames, cylinder blocks
4-5 years Sounds, letters, their own name Sandpaper letters, sound games, first words built with movable letters Numbers and quantities up to 10, counting sticks, first abacus exercises Lacing, brown stair, geometric silhouettes
5-6 years Reading, counting high, understanding ‘how many altogether’ Regular words, trickier sounds (sh, ch, ee), short sentences Adding and taking away with materials, crossing the ten, zero Inventing geometric figures, tying knots, serving at the table
Advice and answers

Frequently asked questions from parents of 3 to 6 year olds

Reading, maths, organising the home: the questions that come up most often during the nursery and Reception years.

Montessori toys for 3 year olds: do you need a Montessori nursery, or is home enough?

Home is enough for the essentials. A low shelf with a few activities, everyday practical life tasks, sound games and a little maths equipment cover what this age needs. A Montessori school mainly adds a mixed-age group and the full range of classroom materials; at home, you keep the spirit of it: let your child choose, show things slowly, and do not interrupt.

Montessori toys by age, from birth to 6

Why does writing come before reading in the Montessori approach?

Because it is easier to build a word from sounds you already know than to decode a word written by someone else. With sandpaper letters, a child links each sound to a shape; with movable letters, they write their first words without depending on a pencil. When they read back what they have built, reading begins, often with no visible effort.

At what age should you start sandpaper letters?

Usually around three and a half or 4, when your child enjoys finding the first sound in words. Before that, listening games are enough. Present two or three letters at a time, by their sound, and move at your child's pace. They are easy to make with fine sandpaper and thick card.

How can you learn to read the Montessori way without piling on the pressure?

By following the steps in order: sound games, sandpaper letters, building words with movable letters, then reading regular words placed next to objects. Move on to the next step when your child asks for it, do not correct the spelling of the words they build, and keep reading them stories every evening, just for the pleasure of it.

Should children learn the names or the sounds of letters?

The sounds first. With sounds, a child hears straight away that ‘mmm’ and ‘aaa’ make ‘ma’. With names (‘em’, ‘ay’), blending simply does not work. Letter names are learnt later without any difficulty, for example with the alphabet song.

From what age can a child use an abacus?

A horizontal 100-bead abacus is usually offered from 4, with an adult nearby, for counting to 10 and then to 100. Adding and crossing the ten come at around 5. The Chinese abacus, with its beads worth 5, is better suited to children who are already confident with numbers.

Our horizontal wooden abacus with 100 beads

How do you help a 5 year old understand zero?

With a spindle box: ten compartments numbered from 0 to 9 and 45 sticks to share out. When they reach the 0 compartment, your child puts nothing in and understands that zero means ‘none’. Because the number of sticks is exact, if any are left over or missing, the mistake shows without an adult having to point it out.

How many activities should you leave on the shelf?

Four to six are enough, each one complete on its own tray. Every one to two weeks, swap the ones that are no longer being chosen and keep the ones they come back to every day. The rest of the toys wait in a cupboard: less choice brings more concentration.

How should I react when my child gets something wrong?

Without making a drama of it or pointing it out. Good materials show the mistake by themselves: the cylinder that will not go in, the extra stick, the piece sticking out of the tray. Let your child notice and put it right alone. If they do not see it, put the activity away with a smile and offer it again another day, after presenting it once more.

Montessori toys for 5 year olds nearing 6: what should come next?

Activities that call for more precision and reasoning: adding and taking away beyond 10, first problems, reading short sentences, logic games and brain teasers, and finer everyday skills such as tying shoelaces. Materials for the next age group gradually take over.

Toys for 6 year olds and up Brain teasers and logic games

My child is 5 and not yet interested in letters: is that a problem?

Children vary enormously at this age, and an interest in letters often arrives all at once. Keep up the sound games, the stories and the hands-on activities, which prepare for reading without seeming to, and offer a sandpaper letter from time to time without insisting. If something worries you, talk to their teacher.

Language & Reasoning

Montessori Toys 3 to 6 Years

Puzzles, tangrams, sandpaper letters and practical life activities to nourish the absorbent mind.